On Amazon, having a great product isn’t enough — your listing is what determines whether you get seen and whether you sell.
Amazon listing optimization has a dual role: SEO and CRO. You need to optimize for the A10 algorithm to rank in search results, and at the same time, convince real buyers to click and convert. Doing only one of these well is not enough.
The problem is that most listings either rank but don’t convert, or convert but never get traffic — leaving products stuck on page 3 or beyond.
This guide breaks down 7 practical steps to help you improve both visibility and conversion, so your listing doesn’t just get found — it actually drives sales.
Key Takeaways:
- Amazon listing optimization = SEO (ranking) + CRO (conversion)
- A10 algorithm prioritizes sales performance signals over keywords alone
- Start with solid keyword research and structure them by priority
- Title, images, and bullet points have the biggest impact on performance
- Backend keywords help expand reach, but don’t replace strong content
- Continuous testing and iteration are key to long-term growth
What Is Amazon Listing Optimization?
Amazon listing optimization is the process of improving key elements of your product page — including the title, bullet points, images, and keywords — to increase both search visibility and conversion rate.
Unlike traditional SEO, Amazon optimization targets two things at once:
- The algorithm (to rank higher)
- The buyer (to drive purchases)
Understanding Amazon’s A10 Algorithm
Amazon’s A10 algorithm decides which products show up in search results and how they rank. While keywords are still important, A10 focuses more on how well your listing performs — including conversion rate, sales velocity, click-through rate (CTR), and customer feedback.
In simple terms, Amazon ranks products that are most likely to sell. That’s why effective listing optimization isn’t just about adding keywords, but about creating a listing that attracts clicks and consistently converts them into sales.
7 Steps to Optimize Amazon Listing
Step 1: Do Keyword Research the Right Way
Every Amazon product optimization project starts here. Without knowing which keywords buyers actually use, every other optimization decision is guesswork.
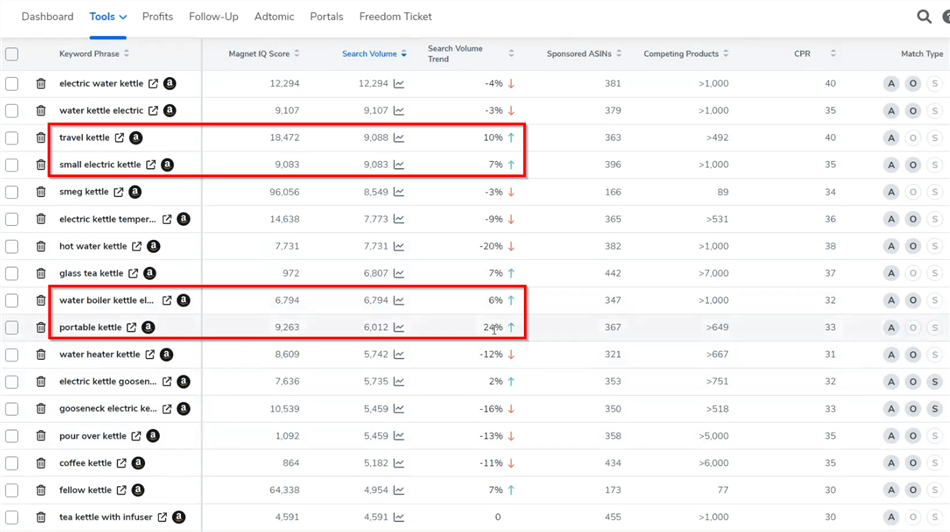
Start with seed terms, then expand. Enter your product's core descriptor into Amazon's search bar and note the autocomplete suggestions — these are real queries from real buyers. Then use an Amazon listing optimization tool to find volume, competition, and long-tail variants.
Recommended tools for Amazon keyword research:
Tool | Best For | Cost |
Full-suite keyword research + listing optimization | Paid (free tier available) | |
Market intelligence + keyword tracking | Paid | |
Performance monitoring + keyword analytics | Paid (free trial) | |
Amazon Brand Analytics | First-party search term data (Brand Registry required) | Free with Brand Registry |
What to look for in keyword data:
- Search volume: How many buyers search this term monthly
- Relevance: Does this term describe what your product actually is?
- Competition: How many listings are already targeting this term?
- Conversion rate: Some tools show which keywords drive purchases, not just clicks
Keyword Tiers to Target
Organize your keywords into three tiers before writing any copy:
- Tier 1 (Primary): 1–3 high-volume, highly relevant terms → go in the title
- Tier 2 (Secondary): 5–10 medium-volume variants → go in bullet points and description
- Tier 3 (Long-tail): 20–50 specific, lower-volume terms → go in backend search terms
💡 Pro tip for marketers: Don't just research your own product — run the same keyword analysis on your top 3 competitors' listings. Tools like Helium 10's "Reverse ASIN" feature reveal which keywords are driving traffic to competing listings, surfacing terms you may have missed entirely.
Step 2: Write a Title That Ranks and Converts
The product title is the single most important field for Amazon SEO. It carries the highest keyword weight in the A10 algorithm and is the first thing buyers read when they see your listing in search results.
Amazon's title character limit varies by category (typically 80–200 characters), but the practical rule is: put your most important keyword in the first 60–80 characters, because that's what displays in mobile search results before truncation.
Recommended title structure:
[Brand Name] + [Primary Keyword] + [Key Feature/Benefit] + [Size/Variant/Quantity]
Example (before optimization):
"Stainless Steel Water Bottle"
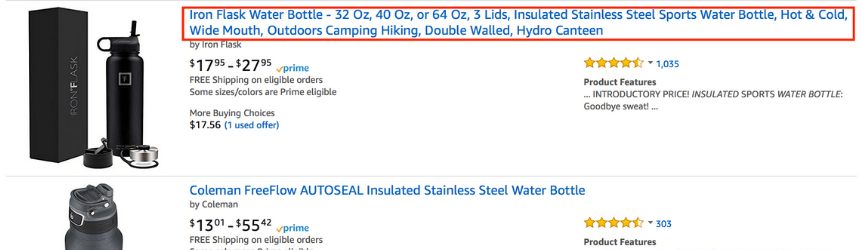
Example (after optimization):
"HydroMax Insulated Stainless Steel Water Bottle 32oz — Keeps Drinks Cold 24 Hours, Leak-Proof Lid, BPA-Free"
The optimized version includes the primary keyword ("insulated stainless steel water bottle"), a key differentiator ("keeps drinks cold 24 hours"), and a trust signal ("BPA-Free") — all within the first 80 characters.
Title Optimization Rules:
- Include your primary Tier 1 keyword naturally in the first 60–80 characters
- Add one or two key differentiators (size, material, key benefit)
- Use title case (capitalize major words)
- Do not keyword-stuff — Amazon can suppress listings for unnatural keyword density
- Do not include promotional language ("Best Seller", "On Sale", "#1 Rated") — Amazon prohibits this
- Do not use ALL CAPS
⚠️ Warning: Amazon's search suppression algorithm can remove your listing from search results if the title violates category-specific style guides. Always check the Amazon Seller Central Style Guide for your category before finalizing.
Step 3: Write Bullet Points That Convert
Bullet points are where buyers make their purchase decision. Most shoppers scan the five bullet points before reading anything else — and on mobile, only the first two or three are visible without expanding.
The Benefit-First Framework
The most common mistake in bullet point writing is leading with features instead of benefits. Buyers don't care that your product has "a 304 stainless steel construction" — they care that it "won't rust, crack, or retain odors after hundreds of washes."
Structure each bullet point as:
[BENEFIT IN CAPS] — [Feature that delivers the benefit] + [Proof or context]
Example:
STAYS COLD FOR 24 HOURS — Double-wall vacuum insulation keeps beverages ice-cold all day, even in direct sunlight. No more lukewarm drinks by noon.
Bullet Point Optimization Checklist
- Lead with the most important benefit in the first bullet — this is what mobile buyers see first
- Use your Tier 2 keywords naturally across the five bullets — don't force them, but don't ignore them
- Address the top buyer objections — what do negative reviews of competing products complain about? Answer those concerns proactively
- Keep each bullet under 200 characters for mobile readability
- End with a trust signal in the final bullet — warranty, certifications, customer support promise
💡 Pro tip: Read the 1-star and 2-star reviews of your top competitors. The complaints buyers leave are the objections your bullet points need to preemptively address. This is the fastest way to write conversion-focused copy.
Step 4: Optimize Backend Search Terms
Backend search terms are hidden keyword fields in Seller Central that buyers never see — but Amazon's algorithm indexes them. This is your opportunity to capture search traffic from terms that don't fit naturally into your visible copy.

How to Use Backend Keywords Effectively
Amazon gives you 249 bytes (not characters — bytes, which matters for special characters) for backend search terms. Use every byte.
What to include in backend search terms:
- Synonyms and alternate spellings ("tumbler" if your title says "bottle")
- Common misspellings buyers use ("stainless steel", "insulated")
- Complementary use cases ("gym bag", "hiking", "office desk")
- Foreign language equivalents, if relevant to your market
What NOT to include:
- Words already in your title, bullets, or description (Amazon already indexes those)
- Irrelevant keywords (this dilutes your relevance signals)
- Prohibited terms (competitor ASINs, offensive language)
- Repeated words (no benefit — Amazon ignores duplicates)
📌 Note: Backend search terms are not a ranking shortcut. Amazon's algorithm weighs sales velocity and conversion rate far more heavily than keyword presence alone. Backend terms expand your indexing footprint — they don't substitute for a well-converting listing.
Step 5: Optimize Your Product Images
Images are the single biggest driver of click-through rate in Amazon search results. Before a buyer reads your title, they've already formed an impression from your main image. And once they're on your listing page, images do more conversion work than any text element.
Amazon allows up to 7 images (plus video). Here's how to use each slot:
Image Slot | Content | Purpose |
Main image | Product on white background, filling 85%+ of frame | Algorithm compliance + click-through rate |
Image 2 | Lifestyle shot — product in use by target buyer | Emotional connection + use-case clarity |
Image 3 | Infographic — key features labeled on product | Feature communication without reading |
Image 4 | Size/scale comparison | Reduces "it was smaller than I expected" returns |
Image 5 | Close-up of key differentiator (material, mechanism, etc.) | Builds trust in quality |
Image 6 | Comparison chart vs. generic alternatives | Competitive positioning |
Image 7 | Packaging / what's in the box | Reduces post-purchase disappointment |
Video | 30–60 second product demo | Highest-converting content type on Amazon |
Image Technical Requirements
- Main image: White background (RGB 255, 255, 255), no props, no text, no watermarks
- Minimum resolution: 1,000 × 1,000 pixels (enables zoom function, which increases conversion)
- Recommended resolution: 2,000 × 2,000 pixels for maximum zoom quality
- File formats: JPEG, PNG, GIF, TIFF
Step 6: Build A+ Content That Converts
A+ Content (for Brand Registry sellers) replaces the standard product description with richer modules like comparison charts, lifestyle images, and brand storytelling.
It can increase conversion rates by 3–10%, making it a high-impact, low-effort upgrade for established listings.
Key benefits include improving buyer trust, reducing returns, supporting cross-sells, and adding extra indexed content.
Best practice: focus on clear structure, short sections, lifestyle visuals, and a simple brand narrative that helps buyers quickly understand why your product is worth choosing.
💡 Pro tip for e-commerce marketers: Treat A+ Content as a landing page, not a product description. The buyer has already clicked — your job now is to close the sale. Lead with the transformation ("Here's what your life looks like with this product") before the features.
Step 7: Monitor, Test, and Iterate
Amazon listing optimization is not a one-time project. The algorithm responds to real-time signals — sales velocity, click-through rate, conversion rate, and review sentiment — which means your listing's performance can shift as competitors update their listings, seasonal demand changes, or Amazon adjusts its algorithm.
Set a monthly listing audit cadence:
- Check keyword rankings — are your Tier 1 keywords still ranking in the top 20? Use Helium 10 or Jungle Scout to track position changes.
- Review click-through rate — Amazon Brand Analytics shows your CTR vs. category average. If you're below average, your main image or title needs work.
- Review conversion rate — if CTR is healthy but conversion is low, the problem is in your listing content (bullets, images, A+ content, price, or reviews).
- Monitor competitor listings — when a competitor's listing improves significantly, reverse-engineer what changed.
- Respond to new reviews — especially negative ones. A thoughtful seller response to a 1-star review signals to future buyers that you stand behind your product.
When to Update Your Listing
Signal | Action |
Keyword ranking drops 5+ positions | Refresh title and bullet points with updated keyword research |
CTR falls below category average | A/B test main image and title |
Conversion rate drops without price change | Audit bullet points and A+ content; check for new negative reviews |
New competitor enters with better listing | Reverse-ASIN their listing; identify gaps in your own |
Seasonal peak approaching | Add seasonal keywords to backend terms 4–6 weeks before peak |
How AI Agents Execute the Full Amazon Listing Optimization Workflow
The 7 steps above work. But if you're managing multiple ASINs — or you're an e-commerce marketer overseeing a brand's entire Amazon catalog — executing each step manually across every listing becomes unsustainable. That's where AI agents change the game.
AllyHub is an AI agent platform that can execute the entire Amazon listing optimization workflow end-to-end. Here's what that actually looks like in practice:
What AllyHub Does for Each Step
Optimization Step | How AllyHub Handles It |
Keyword Research | Scrapes Amazon autocomplete suggestions, top competitor listings, and review data — then extracts and organizes keywords into Tier 1 / 2 / 3 buckets automatically |
Title Writing | Generates multiple title candidates based on keyword tiers, follows Amazon title format rules, and compares against top competitor title structures |
Bullet Points | Mines competitor reviews for buyer objections and desires, then writes benefit-first bullet points that address those specific pain points |
Backend Search Terms | Compiles synonyms, misspellings, and use-case terms not present in visible copy — packed into the 249-byte limit without duplicates |
A+ Content Copy | Writes brand story modules, feature-to-benefit copy, and comparison chart content aligned with your keyword strategy |
Competitor Monitoring | Runs on a recurring schedule — extracts listing changes from competitors and flags significant shifts that require your response |
The Compounding Advantage:
What makes an AI agent fundamentally different from running manual research or using a traditional tool is the compounding effect:
- First run: AllyHub explores Amazon's structure for your category, learns the listing format, extracts competitor data, and produces your first optimization deliverable.
- Every run after: It already knows the category structure, the competitor landscape, and your optimization preferences. Each subsequent listing audit is faster, more accurate, and requires less oversight.
This is the opposite of how manual work scales. With a human, optimizing 10 listings takes roughly 10× the time of optimizing 1. With an AI agent, the per-listing cost decreases as the system accumulates knowledge about your brand, your category, and your optimization approach.
How to Use AllyHub for Amazon Listing Optimization
Here's what a complete workflow looks like in AllyHub:
Step 1. Input: Feed AllyHub your ASIN and target category
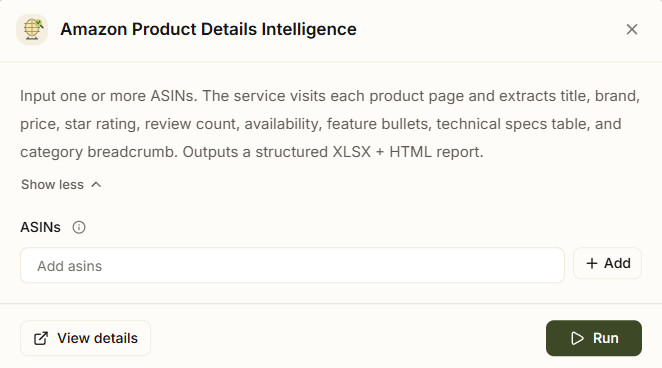
Step 2. Competitor scrape: AllyHub extracts titles, bullet points, A+ content, reviews from your top 10 competitors
Step 3. Keyword extraction: From competitor listings and search data — organized into tiers
Step 4. Copy generation: Title options, bullet points, backend keywords, A+ content copy — all produced with Amazon's best practices built in
Step 5. Deliverable: Exported as a structured document (title, bullets, description, backend terms, image spec recommendations) — ready for Seller Central entry or your review
Frequently Asked Questions
How long does Amazon listing optimization take to show results?
Keyword indexing can happen within 24–72 hours, but meaningful ranking improvements usually take 2–4 weeks as Amazon processes sales and performance signals.
How do I optimize Amazon listings for mobile buyers?
Focus on the first 60–80 characters of your title, a strong first bullet point, and a clear main image. Keep content short and scannable since most mobile users don’t expand full descriptions.
Does A+ Content improve SEO rankings?
Not directly. A+ Content has limited keyword indexing and is not a primary ranking factor. However, it can significantly improve conversion rates, dwell time, and customer engagement — which indirectly boost rankings through stronger sales performance and behavioral signals.
How often should I update Amazon listing keywords?
Every 60–90 days for stable products, or every 30 days for seasonal or fast-changing categories. More frequent updates are needed in competitive niches.
What is the most important optimization element?
Your main image. It drives click-through rate, which is the first and most important step in the conversion funnel. Title and bullet points come next.
How do backend keywords work?
They are hidden search terms that Amazon indexes to expand visibility through synonyms, misspellings, and related phrases. They don’t replace strong on-page optimization.
Can I use competitor brand names?
Generally, no invisible content. Backend usage is risky and not recommended — it’s safer to focus on generic category keywords and your own product benefits.
What to Do Next
Amazon listing optimization is a compounding investment: a well-optimized listing generates more sales, which improves ranking, which generates more sales. The marketers who win on Amazon are the ones who treat listing quality as an ongoing discipline, not a launch-day task.
Start here:
- Run a keyword audit on your top 3 ASINs using Helium 10 or Jungle Scout
- Check your main image CTR in Amazon Brand Analytics — if it's below category average, that's your first fix
- Rewrite your bullet points using the benefit-first framework
- Fill your backend search terms to the 249-byte limit
- If you manage 5+ ASINs, set up an optimization workflow with AllyHub — it handles the research, extraction, and copy generation across all your listings so you can focus on strategy and approval
The difference between a listing that ranks and one that doesn't is rarely a single magic change — it's the accumulation of a dozen small optimizations done right. Start with one step today, test the results, and build from there.